Forex Trading System in 6 Steps: How to Build a Strategy That Works
A forex trading system is the mechanical core of your trading plan. Learn how to build one in 6 structured steps — from signal definition to backtesting to live deployment.
The difference between a trader who follows a system and one who trades on instinct is the difference between a repeatable experiment and random noise. Systems can be tested, refined, and improved. Gut feelings cannot.
Building a forex trading system doesn’t require advanced mathematics or proprietary indicators. It requires clarity: knowing exactly what conditions must exist before you enter a trade, where you’ll get out if you’re wrong, and where you’ll take your profit if you’re right.
Here’s how to build that clarity in six steps.
What Makes a System “Complete”
A complete forex trading system has all of the following defined in writing before you place a single live trade:
- Entry rules: The exact conditions that must be met to enter a trade
- Exit rules — Stop-loss: Where the trade is proven wrong
- Exit rules — Take-profit: Where the trade is proven right
- Position sizing rules: How many lots to trade given your account size and stop-loss
- Trade management rules: How (if at all) you manage the trade while it’s open
- Market conditions filter: When NOT to use the system (news events, ranging conditions, etc.)
If any of these are undefined, your system has gaps. Gaps get filled by emotion in live trading. Emotion is expensive.
Step 1: Define Your Market and Timeframe
Start with a single currency pair and a single primary timeframe. The goal is depth of understanding, not breadth of coverage.
Recommended starting combinations:
| Trading Style | Primary Pair | Primary Timeframe |
|---|---|---|
| Scalping | EUR/USD | 5M |
| Day trading | EUR/USD or GBP/USD | 1H |
| Swing trading | EUR/USD | 4H |
| Position trading | EUR/USD or USD/JPY | Daily |
EUR/USD is the most traded, most documented, and most liquid pair in the world. Start there. Add pairs only after your system is consistently profitable on the first one.
Step 2: Choose Your Signal Logic
Your entry signal is the specific observable event that triggers a trade. It must be objective — meaning two different people looking at the same chart would both see the same signal.
Signal types by complexity:
| Type | Example | Objectivity |
|---|---|---|
| Indicator crossover | 10 EMA crosses above 50 EMA | High |
| Indicator level | RSI drops below 30 then crosses back above | High |
| Price action candle | Bullish engulfing at support | Medium |
| Chart pattern | Head and shoulders neckline break | Medium |
| S/R bounce | Price bounces from tested support with hammer candle | Medium |
| Multi-factor confluence | EMA crossover + RSI oversold + S/R support | Variable |
For your first system, choose the highest-objectivity signals possible. “A crossover occurred” is objective. “Price looked ready to turn” is not.
Define your signal in writing. Test it by looking at historical charts: can you see this signal consistently and unambiguously? If you hesitate on whether the signal occurred, your definition needs refinement.
Step 3: Define Entry, Stop-Loss, and Take-Profit
With the signal defined, specify exactly where you enter, where you stop out, and where you take profit.
Entry
- Market entry: Enter at the open of the next candle after the signal confirmation
- Limit entry: Enter at a specific price level when price retraces to it
- Stop entry: Enter when price breaks above/below a level (breakout)
Market entry is the simplest and most commonly used by beginners. It guarantees entry when the signal fires; the tradeoff is a slightly less precise price.
Stop-Loss Placement
Three valid methods:
Structure-based: Place the stop beyond the nearest key technical level that invalidates the setup. If you’re buying at support, the stop goes below support. Specific, logical, and changes based on the setup.
ATR-based: Place the stop at 1.5–2x the Average True Range. Adapts to current volatility. Wider in volatile conditions, tighter when price is quiet.
Fixed-pip: A defined distance regardless of structure or volatility. Simple, but ignores market context. Acceptable as a starting point for testing.
Take-Profit Placement
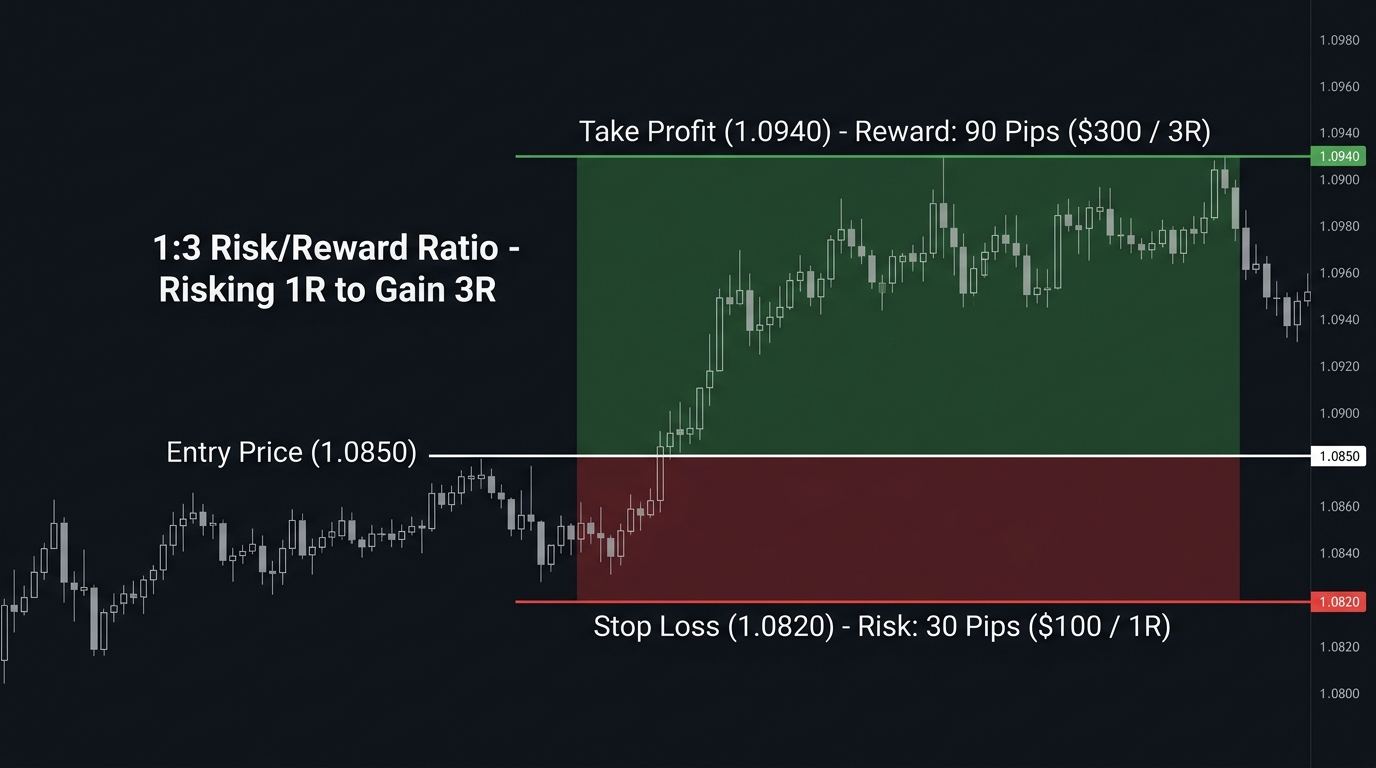
Fixed R-multiple: Target 2x or 3x the stop-loss distance. Example: 30-pip stop → 60-pip target (1:2 R). Simple and consistent.
Structure-based: Exit at the next significant resistance (long) or support (short). More accurate to real price behavior; requires more experience to identify the right levels.
For a first system, use the fixed R-multiple approach. It ensures you maintain positive expected value mathematically.
Step 4: Calculate Position Size
Every entry needs a position size determined before you enter, based on your risk percentage and stop-loss distance.
Formula:
Risk Amount = Account Balance × Risk %
Position Size = Risk Amount ÷ (Stop-Loss Pips × Pip Value)
Example:
- Account: $5,000
- Risk: 1% = $50
- Stop-loss: 30 pips on EUR/USD
- Pip value (standard lot): $10
Position size = $50 ÷ (30 × $10) = $50 ÷ $300 = 0.17 lots
Use the position size calculator to run this for every trade. Never estimate. Never round up to a “nicer” lot size. The calculation is the calculation.
Step 5: Write the Rules Down Completely
This is the step most traders skip — and it’s the most important one. Your trading system must be written out in explicit, unambiguous terms.
Template:
SYSTEM: [Name]
Market: EUR/USD
Timeframe: 4H

ENTRY RULES:
Long entry when ALL of the following are true:
1. 10 EMA is above 50 EMA
2. RSI(14) was below 45 and is now rising above 45
3. Price is above the 200 SMA
4. The most recent 4H candle closed bullish
Entry: Market order at next 4H open

STOP-LOSS: Below the lowest wick of the signal candle (minimum 20 pips)
TAKE-PROFIT: 2x the stop-loss distance

POSITION SIZE: 1% of account at all times (use calculator)

FILTERS (do NOT trade if any apply):
- Major news event within 2 hours
- ADX below 20 (no trend)
- Friday after 15:00 GMT
- Daily drawdown limit already hit

TRADE MANAGEMENT:
- Move stop to breakeven when trade is 1x risk in profit
- No other adjustments
The more specific your rules, the more consistently you’ll execute them. Ambiguity is the enemy.
Step 6: Test Before You Trade With Real Money
A system you haven’t tested is a hypothesis, not a strategy.
Testing sequence:
Step A — Manual backtest: Look back at 3–6 months of historical charts on your chosen pair and timeframe. Apply your system rules exactly. Record every trade (entry, exit, result). Calculate the overall win rate and average risk-reward from at least 50 historical trades.
Step B — Forward test on demo: Run the system on a demo account for 4–8 weeks. Use the same position sizes you’d use with real money (the psychological experience is important). Compare results to the backtest.
Step C — Evaluate the results: Is the win rate consistent with backtest? Is the average RR close to your target? Are there specific market conditions (ranging vs. trending) where results diverge significantly?
Minimum viable data before going live: 100+ backtested trades + 30+ demo trades with positive expectancy. Anything less is insufficient statistical basis.
Step D — Small live account: Trade your smallest valid position size with real capital for the first month. Psychology changes completely when real money is involved. Document everything in your trading journal.
When to Modify the System
Modify your system when you have data-driven reasons to, not when you’re frustrated by a losing streak.
Valid reasons to modify:
- Backtest and live results diverge significantly over 50+ trades
- A specific market condition is consistently producing losses (identify it clearly)
- A clear rule is ambiguous in practice and causing inconsistent application
Invalid reasons to modify:
- You just had three consecutive losses
- You “feel” the market has changed
- Another trader told you to add a specific indicator
Systems evolve through disciplined testing, not emotional reactions.
Key Takeaways
- A complete trading system has six defined components: entry rules, stop-loss, take-profit, position sizing, trade management, and market filters
- Start with one currency pair (EUR/USD) and one timeframe — depth before breadth
- Entry signals must be objective: two different traders looking at the same chart should identify the same signal
- Stop-loss must be defined before entry — structure-based or ATR-based is preferable to arbitrary fixed pips
- Write the complete system in explicit, unambiguous terms before trading it
- Backtest over at least 50 historical trades, then forward-test on demo for 4–8 weeks before committing real capital
- Modify the system based on data, not emotions
Next: Testing Your Trading System | Trading Journal Setup
Tools: Position Size Calculator

Ready to Practice This Strategy?
Test what you learned on a free, risk-free demo account before risking real money.